
Chapter 4 Lesson 1 - Connecting the Blockchain
Welcome, noobs! Today, we are going to finally connect blockchain stuff directly into our frontend code. This is my specialty, so get ready to get your mind absolutely blown.
Installing FCL
FCL, or the Flow Client Library, is something that will allow us to do tons of blockchain stuff in our DApp. It will let us send transactions, execute scripts, and tons of other stuff directly from our frontend code.
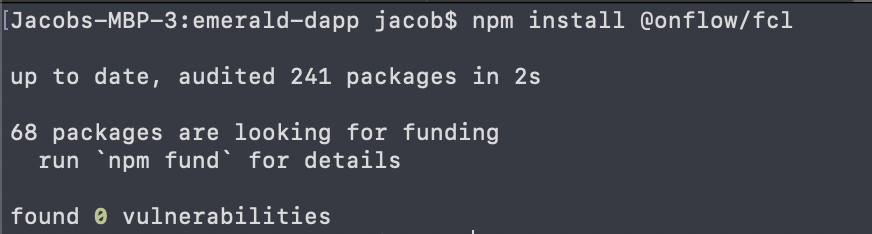
Go to your project directory in your terminal and type
npm install @onflow/fcl. This will install the dependency:
Importing & Connecting FCL
Go to your
flowfolder and create a file calledconfig.js. Inside that file, put the following code:
			import { config } from '@onflow/fcl';

config()
	.put('accessNode.api', 'https://rest-testnet.onflow.org') // This connects us to Flow TestNet
	.put('discovery.wallet', 'https://fcl-discovery.onflow.org/testnet/authn/') // Allows us to connect to Blocto & Lilico Wallet
	.put('app.detail.title', 'Beginner Emerald DApp') // Will be the title when user clicks on wallet
	.put('app.detail.icon', 'https://i.imgur.com/ux3lYB9.png'); // Will be the icon when user clicks on wallet
What this does is it connects our DApp to Flow TestNet and tells our DApp that when we go to log in, we can log in to Blocto & Lilico Wallet (which are both a part of something called “FCL Discovery”).
Loggin In
Now that we have connected our DApp to the blockchain, let’s try logging in!
Go to
./components/Nav.jsxand at the top, add three more imports:
			import * as fcl from '@onflow/fcl';
import '../flow/config.js';
import { useState, useEffect } from 'react';
First, we import fcl so that we can call some functions to log in and log out. Second, we import the config we defined so our DApp knows what network (testnet) it is talking to. And third, we import useState (which we already know), and useEffect (which we’ll learn soon).
Inside of our
Navcomponent, let’s add a variable calleduserusinguseState:
const [user, setUser] = useState({ loggedIn: false });
Note that when we put something inside the useState parenthesis (in this case: { loggedIn: false }), that represents a default value of the variable. Because the user starts as logged out, it makes sense to have this be the default value.
Next, right below that, add this piece of code:
			useEffect(() => {
	fcl.currentUser.subscribe(setUser);
}, []);
useEffect is a function that runs every time something happens. That “something” comes from what is put inside the [] brackets. In this case, because [] is empty, this means “every time the page is refreshed, run fcl.currentUser.subscribe(setUser). It looks complicated, but all this code is doing is making sure the user variable retains its value even if the page is refreshed.
Lastly, we want to be able to actually log in. Let’s create a function to do this.
Right below our
useEffect, make a new function calledhandleAuthentication:
function handleAuthentication() {}
Inside the function, we’re going to implement this logic:
- If the user is logged in, then log out
- If the user is logged out, then log in
We can do that by doing this:
			function handleAuthentication() {
	if (user.loggedIn) {
		fcl.unauthenticate(); // logs the user out
	} else {
		fcl.authenticate(); // logs the user in
	}
}
Now we want to be able to call this function when we click the “Log In” button.
Add an
onClickhandler to our<button>tag and when its clicked, have it call the function namedhandleAuthentication.
Your button should now look like this:
<button onClick="{handleAuthentication}">Log In</button>
Save your changes and go to your webpage. Click the log in button and see what happens! You should see this:
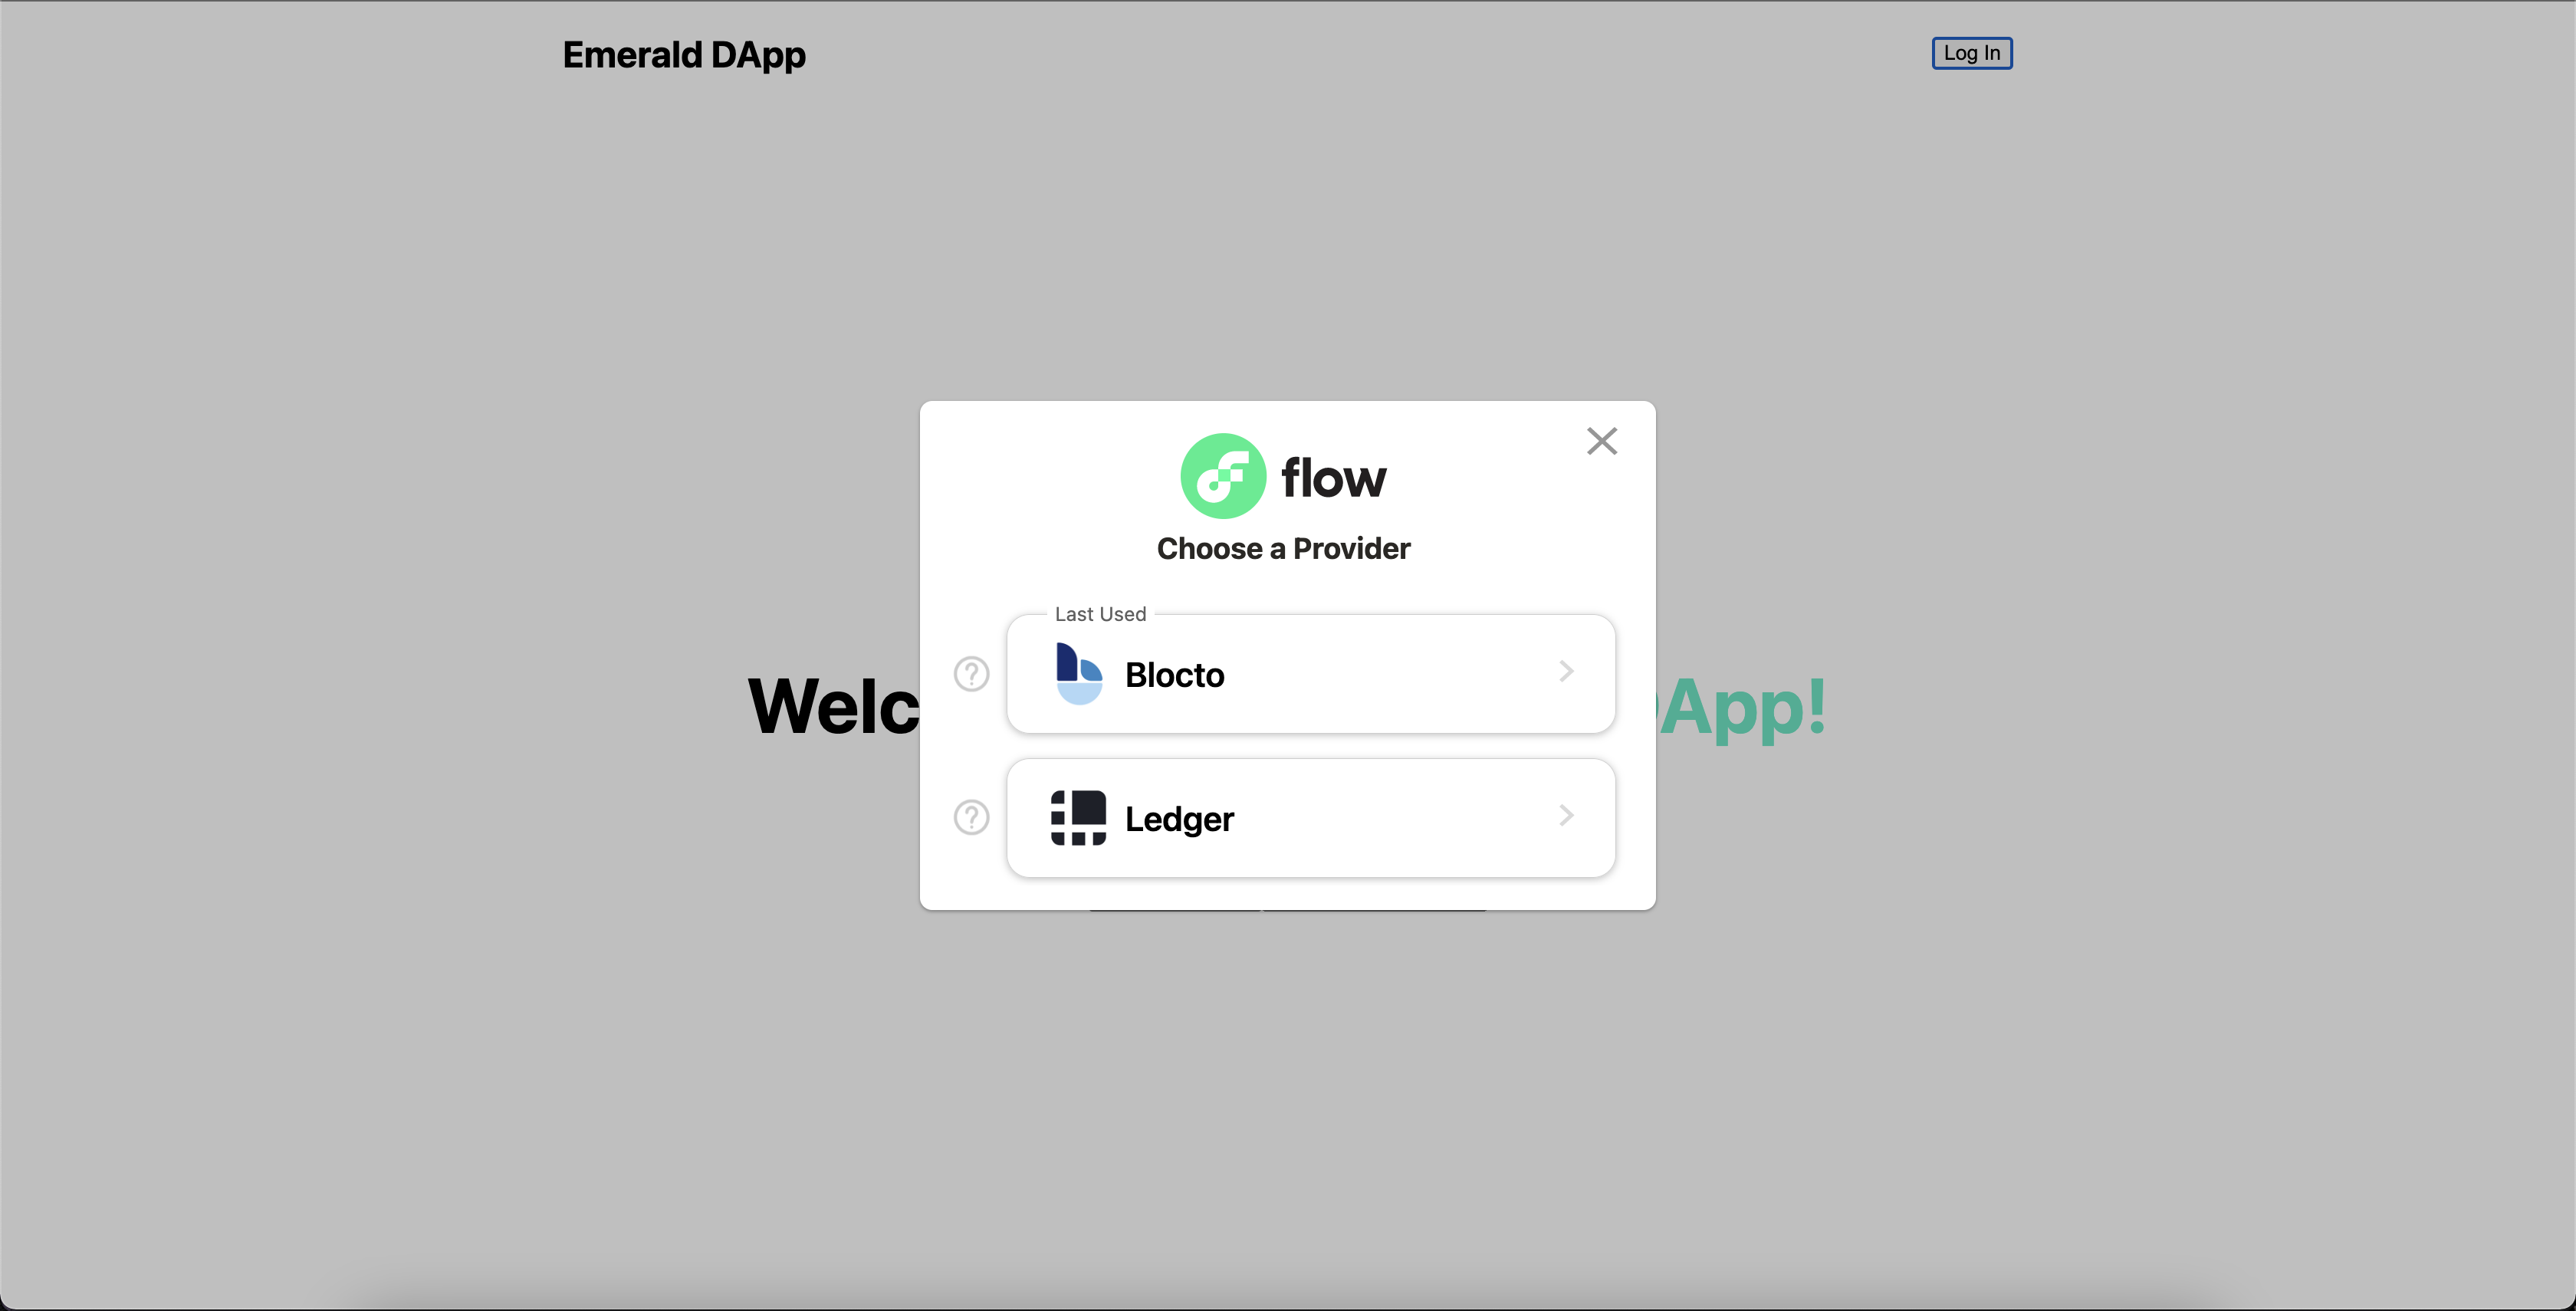
Isn’t this just so cool? Or am I a boring nerd. Your Nav.jsx file should now look like this:
			import styles from '../styles/Nav.module.css';
import { useState, useEffect } from 'react';
import * as fcl from '@onflow/fcl';
import '../flow/config.js';

export default function Nav() {
	const [user, setUser] = useState({ loggedIn: false });

	useEffect(() => {
		fcl.currentUser.subscribe(setUser);
	}, []);

	function handleAuthentication() {
		if (user.loggedIn) {
			fcl.unauthenticate();
		} else {
			fcl.authenticate();
		}
	}

	return (
		<nav className={styles.nav}>
			<h1>Emerald DApp</h1>
			<button onClick={handleAuthentication}>Log In</button>
		</nav>
	);
}
Making our Button Respond
The problem now is that, even when we log in with Blocto, there is no indication to the user that we are logged in.
To change that, let’s make our button look like this:
<button onClick="{handleAuthentication}">{user.loggedIn ? user.addr : "Log In"}</button>
We added some logic inbetween {} inside our button text. In Next.js (or React.js), when you put {} inside of an HTML tag, that indicates you are doing some Javascript stuff. {user.loggedIn ? user.addr : "Log In"} means:
- If the user is logged in, display
user.addr(the address of the user is stored inside of theuservariable) - If the user is not logged in, display “Log In”
Now when you are logged in, you should see this:
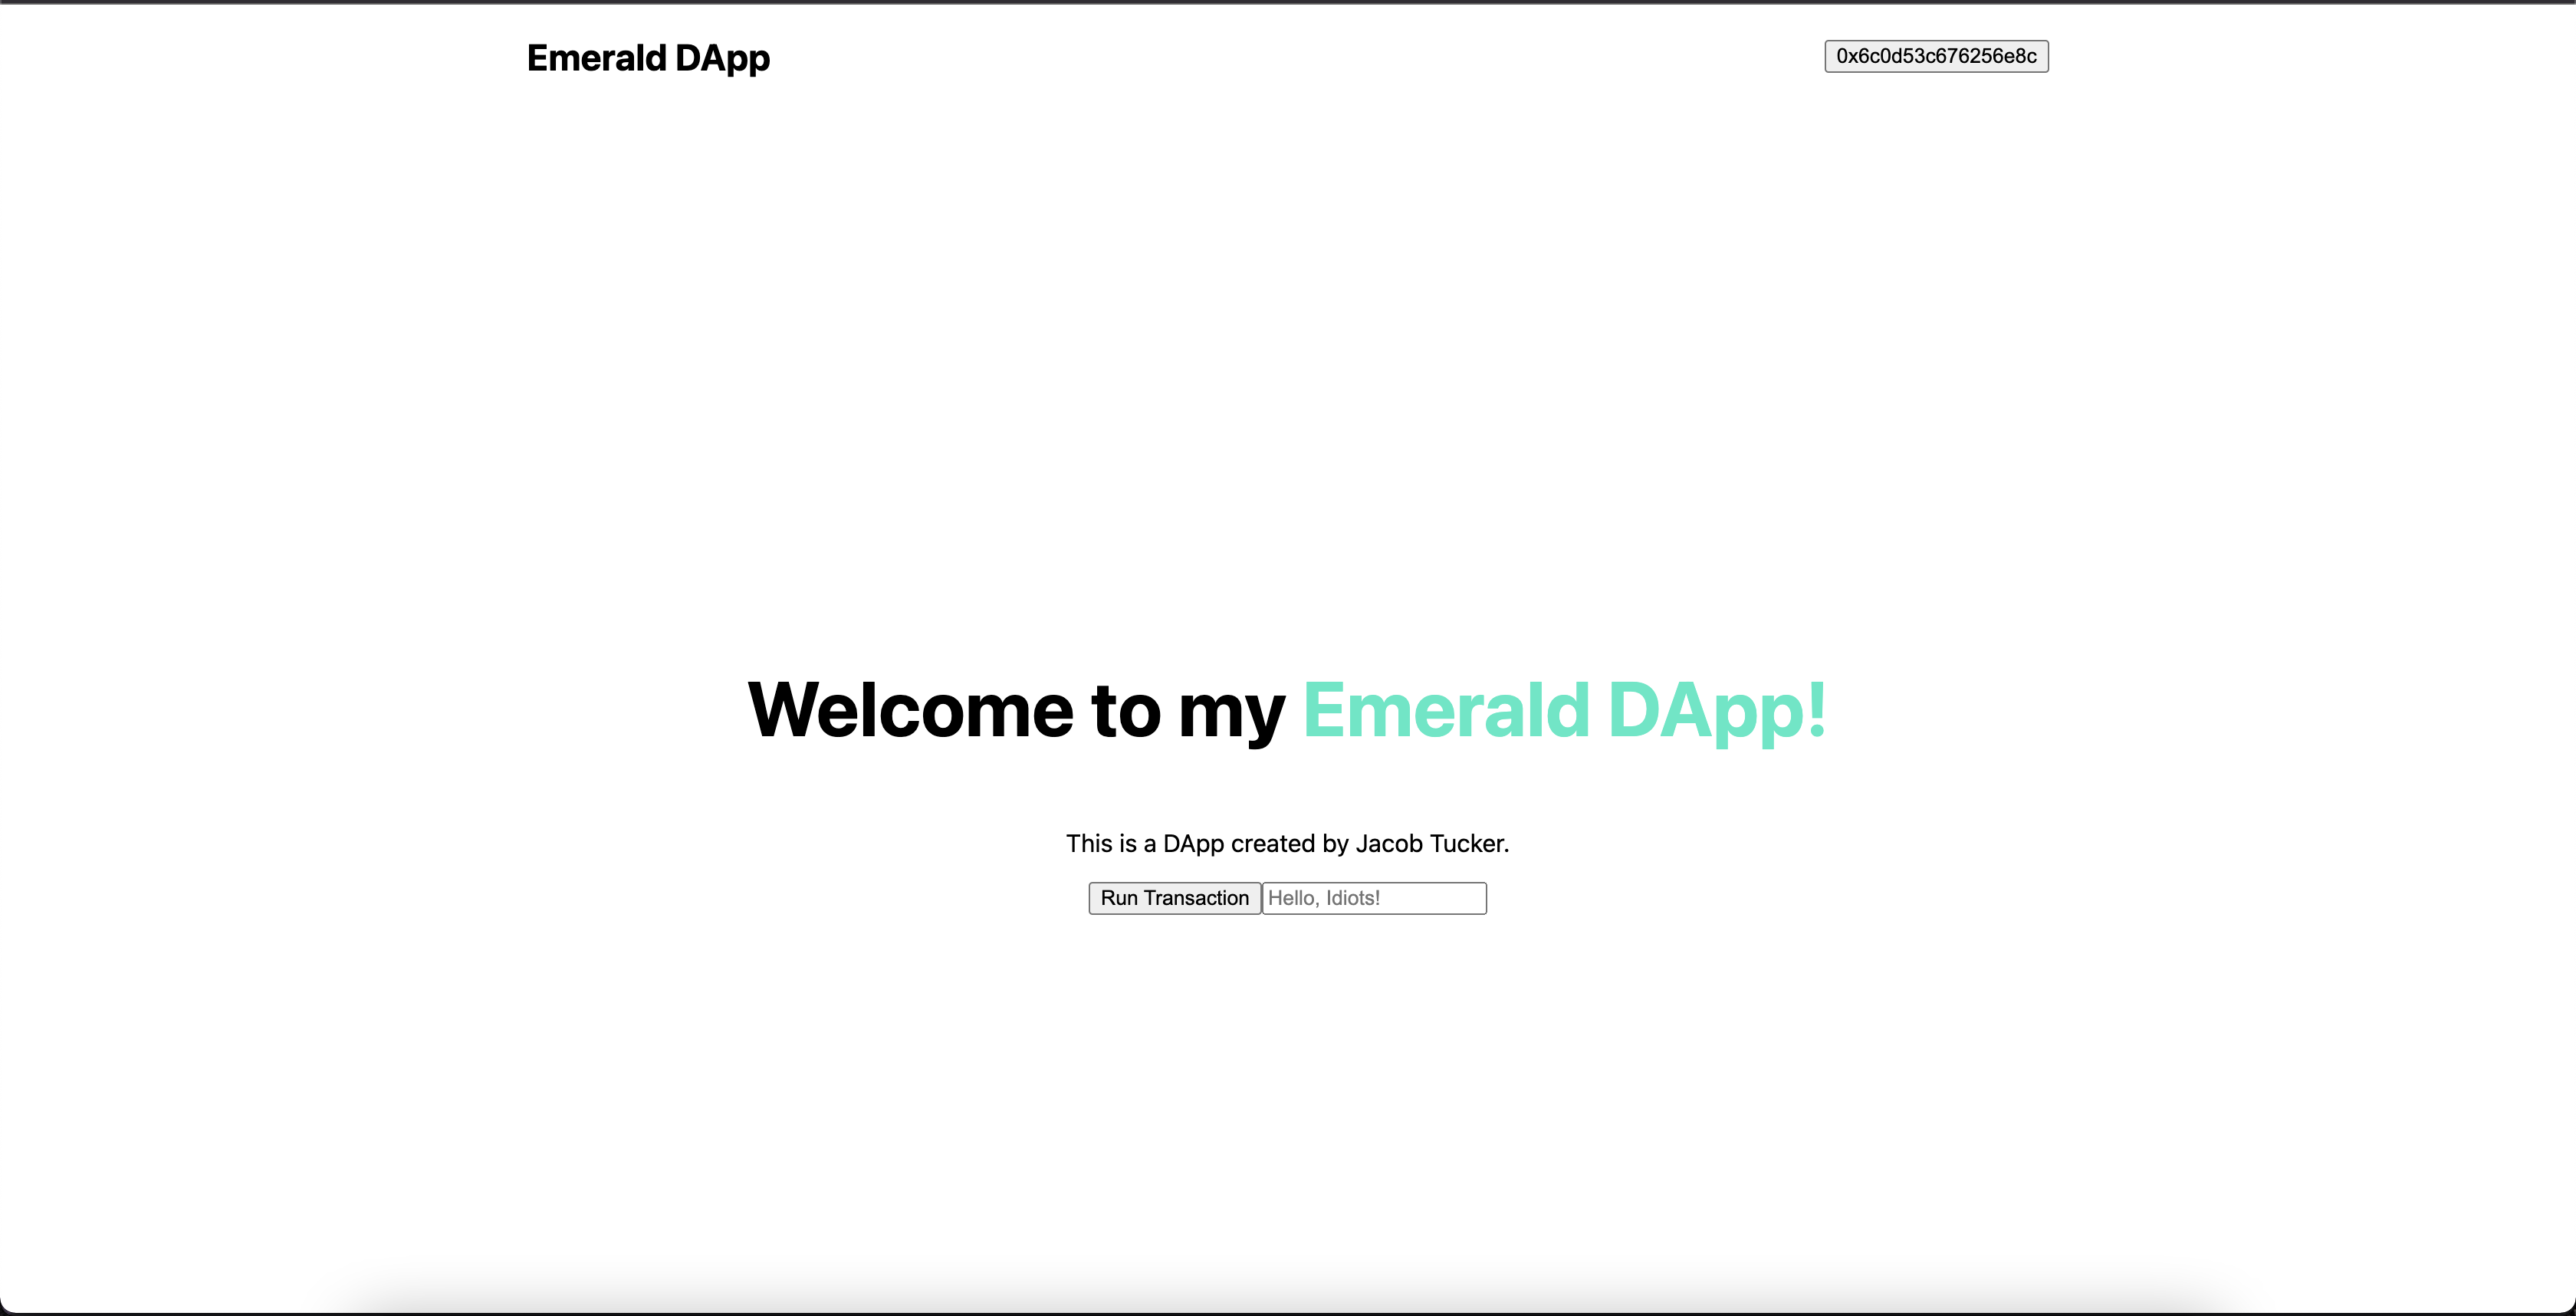
If you click the button again, it will log you back out, and you can log in again :)
Conclusion
Wooohooo! We figured out how to log in. That wasn’t so bad, right?!
Quests
Feel free to answer in a language you’re most comfortable in.
- How did we get the address of the user? Please explain in words and then in code.
- What do
fcl.authenticateandfcl.unauthenticatedo? - Why did we make a
config.jsfile? What does it do? - What does our
useEffectdo? - How do we import FCL?
- What does
fcl.currentUser.subscribe(setUser);do?