
Chapter 4 Lesson 2 - Running a Script
Yoooooooooo yo yo YO! Today we are going to learn how to run a script on the Blockchain to read our greeting variable from our smart contract.
Videos
If you watch this video, it will help you understand the content for today. Note that they are different, but the concept is the same: https://www.youtube.com/watch?v=XjderBnmPtU
Quick Overview of Scripts
If you remember back from Chapter 1, a script will allow us to read information from our smart contracts. In addition, scripts are completely free.
We will utilize a script to read our greeting variable from our smart contract, which we deployed in Chapter 3 Lesson 3.
Executing a Script using FCL
In our ./pages/index.js file, let’s add a function to execute a script on Flow using FCL.
Under the
runTransactionfunction you made in the quests of Chapter 2 Lesson 4, make a new function calledexecuteScript:
async function executeScript() {}
What does async mean? async means this function is an “asynchronous function.” The reason we must make it an asynchronous function is because we’re going to be returning something called a Promise from our script call, and to wait for the result of that Promise, we need to use the await keyword. Let’s keep going so you can see what I mean.
Inside your function, let’s actually execute a script using FCL by doing two things:
- Importing
fclat the top of the file so we can call thefcl.queryfunction:
import * as fcl from '@onflow/fcl';
- Adding this code inside the
executeScriptfunction:
			async function executeScript() {
	const response = await fcl.query({
		cadence: ``, // CADENCE CODE GOES IN THESE ``
		args: (arg, t) => [] // ARGUMENTS GO IN HERE
	});

	console.log('Response from our script: ' + response);
}
Okay whoah. That’s a lot. What just happened?
const response = await fcl.query()- this part is saying, “We are going to execute a script using thefcl.queryfunction. Then, we are going to wait for that result using theawaitkeyword (which is why we needed to make this functionasync), and then we are going to store the result inside theresponsevariable.- Inside the
fcl.queryfunction, it takes in an object with a few things inside of it:cadence(which is the Cadence code as a string), andargs(which is a list of arguments needed for our script). - We
console.logthe result afterwards.
In this case, we want to read the greeting variable from our contract. Well, we actually already wrote it in Chapter 3 Lesson 1!
Go to your
./flow/cadence/scripts/readGreeting.cdcfunction and copy everything in that file into yourcadencestring. It should look like this:
			async function executeScript() {
	const response = await fcl.query({
		cadence: `
    import HelloWorld from "../contracts/HelloWorld.cdc"

    pub fun main(): String {
        return HelloWorld.greeting
    }
    `,
		args: (arg, t) => [] // ARGUMENTS GO IN HERE
	});

	console.log('Response from our script: ' + response);
}
Sweet! But there’s one problem: The blockchain is going to have no idea what "../contracts/HelloWorld.cdc" means. Instead, we have to give it an address!
In Chapter 3 Lesson 3, you deployed your contract to a testnet account.
Get the address for that account (you probably stored it in your
flow.json) and replace it in the import, like so:
			async function executeScript() {
	const response = await fcl.query({
		cadence: `
    import HelloWorld from 0x90250c4359cebac7 // THIS WAS MY ADDRESS, USE YOURS

    pub fun main(): String {
        return HelloWorld.greeting
    }
    `,
		args: (arg, t) => [] // ARGUMENTS GO IN HERE
	});

	console.log('Response from our script: ' + response);
}
Nice! Now let’s figure out how to call that function in our code so we can see if it’s working!
Seeing our Greeting
We could make a button and call this function every time we click the button, but that’s boring and we already know how to do that. Instead, lets call this function every time the page refreshes.
We learned in Chapter 4 Lesson 1 (yesterday) that we can do this by using useEffect to do something every time something happens (which in this case is a page refresh). Let’s do that in code by doing two things:
- Adding
useEffectto our imports:
import { useState, useEffect } from 'react';
- Putting a
useEffectunderneath ourexecuteScriptfunction:
			useEffect(() => {
	executeScript();
});
But how do we make sure this happens every time we refresh the page? Remember from Chapter 4 Lesson 1 that you have to add the []:
			useEffect(() => {
	executeScript();
}, []);
Now, if you go back to http://localhost:3000 and open your developer console, you should see your greeting appearing!
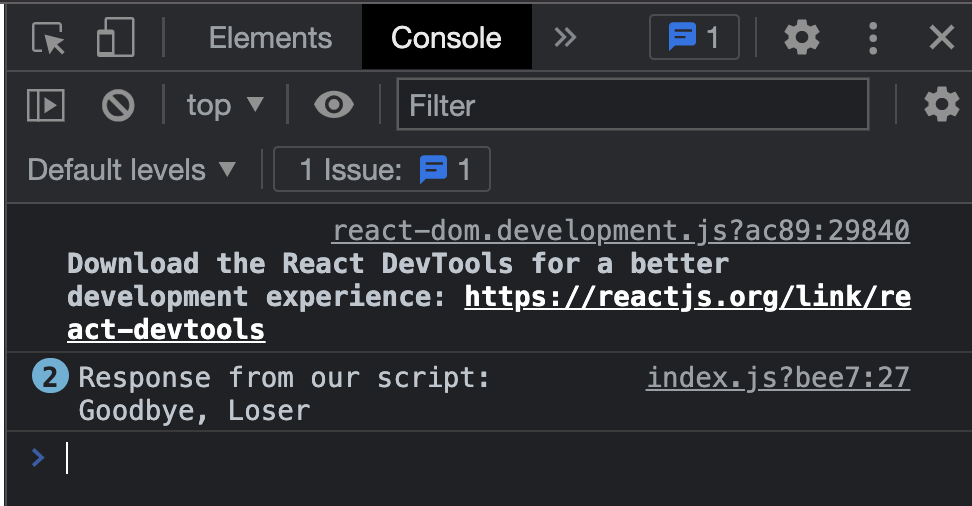
Of course, mine is “Goodbye, Loser”. How sweet of me.
Conclusion
We did it! We are successfully reading from the blockchain. Here is what your ./pages/index.js page should now look like:
			import Head from 'next/head';
import styles from '../styles/Home.module.css';
import Nav from '../components/Nav.jsx';
import { useState, useEffect } from 'react';
import * as fcl from '@onflow/fcl';

export default function Home() {
	const [newGreeting, setNewGreeting] = useState('');

	function runTransaction() {
		console.log('Running transaction!');
		console.log('Changing the greeting to: ' + newGreeting);
	}

	async function executeScript() {
		const response = await fcl.query({
			cadence: `
      import HelloWorld from 0x90250c4359cebac7 // THIS WAS MY ADDRESS, USE YOURS

      pub fun main(): String {
          return HelloWorld.greeting
      }
      `,
			args: (arg, t) => [] // ARGUMENTS GO IN HERE
		});

		console.log('Response from our script: ' + response);
	}

	useEffect(() => {
		executeScript();
	}, []);

	return (
		<div>
			<Head>
				<title>Emerald DApp</title>
				<meta name="description" content="Created by Emerald Academy" />
				<link rel="icon" href="https://i.imgur.com/hvNtbgD.png" />
			</Head>

			<Nav />

			<main className={styles.main}>
				<h1 className={styles.title}>
					Welcome to my{' '}
					<a href="https://academy.ecdao.org" target="_blank">
						Emerald DApp!
					</a>
				</h1>
				<p>This is a DApp created by Jacob Tucker.</p>

				<div className={styles.flex}>
					<button onClick={runTransaction}>Run Transaction</button>
					<input onChange={(e) => setNewGreeting(e.target.value)} placeholder="Hello, Idiots!" />
				</div>
			</main>
		</div>
	);
}
Quests
You have a lot of tools under your belt now, in fact much more than you think you do. Let’s see what you’re capable of…
- Instead of console logging the result after the script executes, I want you to:
- Make a new variable named
greetingusinguseState - Set the
greetingvariable to theresponseof the script call - Create a
<p>tag after the<div className={styles.flex}>tag - Put the
greetingvariable inside of that<p>tag. This will make the result of your script show on your webpage! It should look something like this:

2a. I deployed a contract called SimpleTest to an account with an address of 0x6c0d53c676256e8c. I want you to make a button that, when clicked, executes a script to read the number variable from that contract. If you’re curious, you can see the contract here: https://flow-view-source.com/testnet/account/0x6c0d53c676256e8c/contract/SimpleTest
Submit all the code you used to call the script, and the result of the script.
2b. Then, I want you to remove the button, and make the script execute every time the page refreshes.
Submit all the code you used to do this.